Robotics research has become cheap and accessible enough that small teams, and even individuals, can now do meaningful research on real hardware. There are two reasons for this.
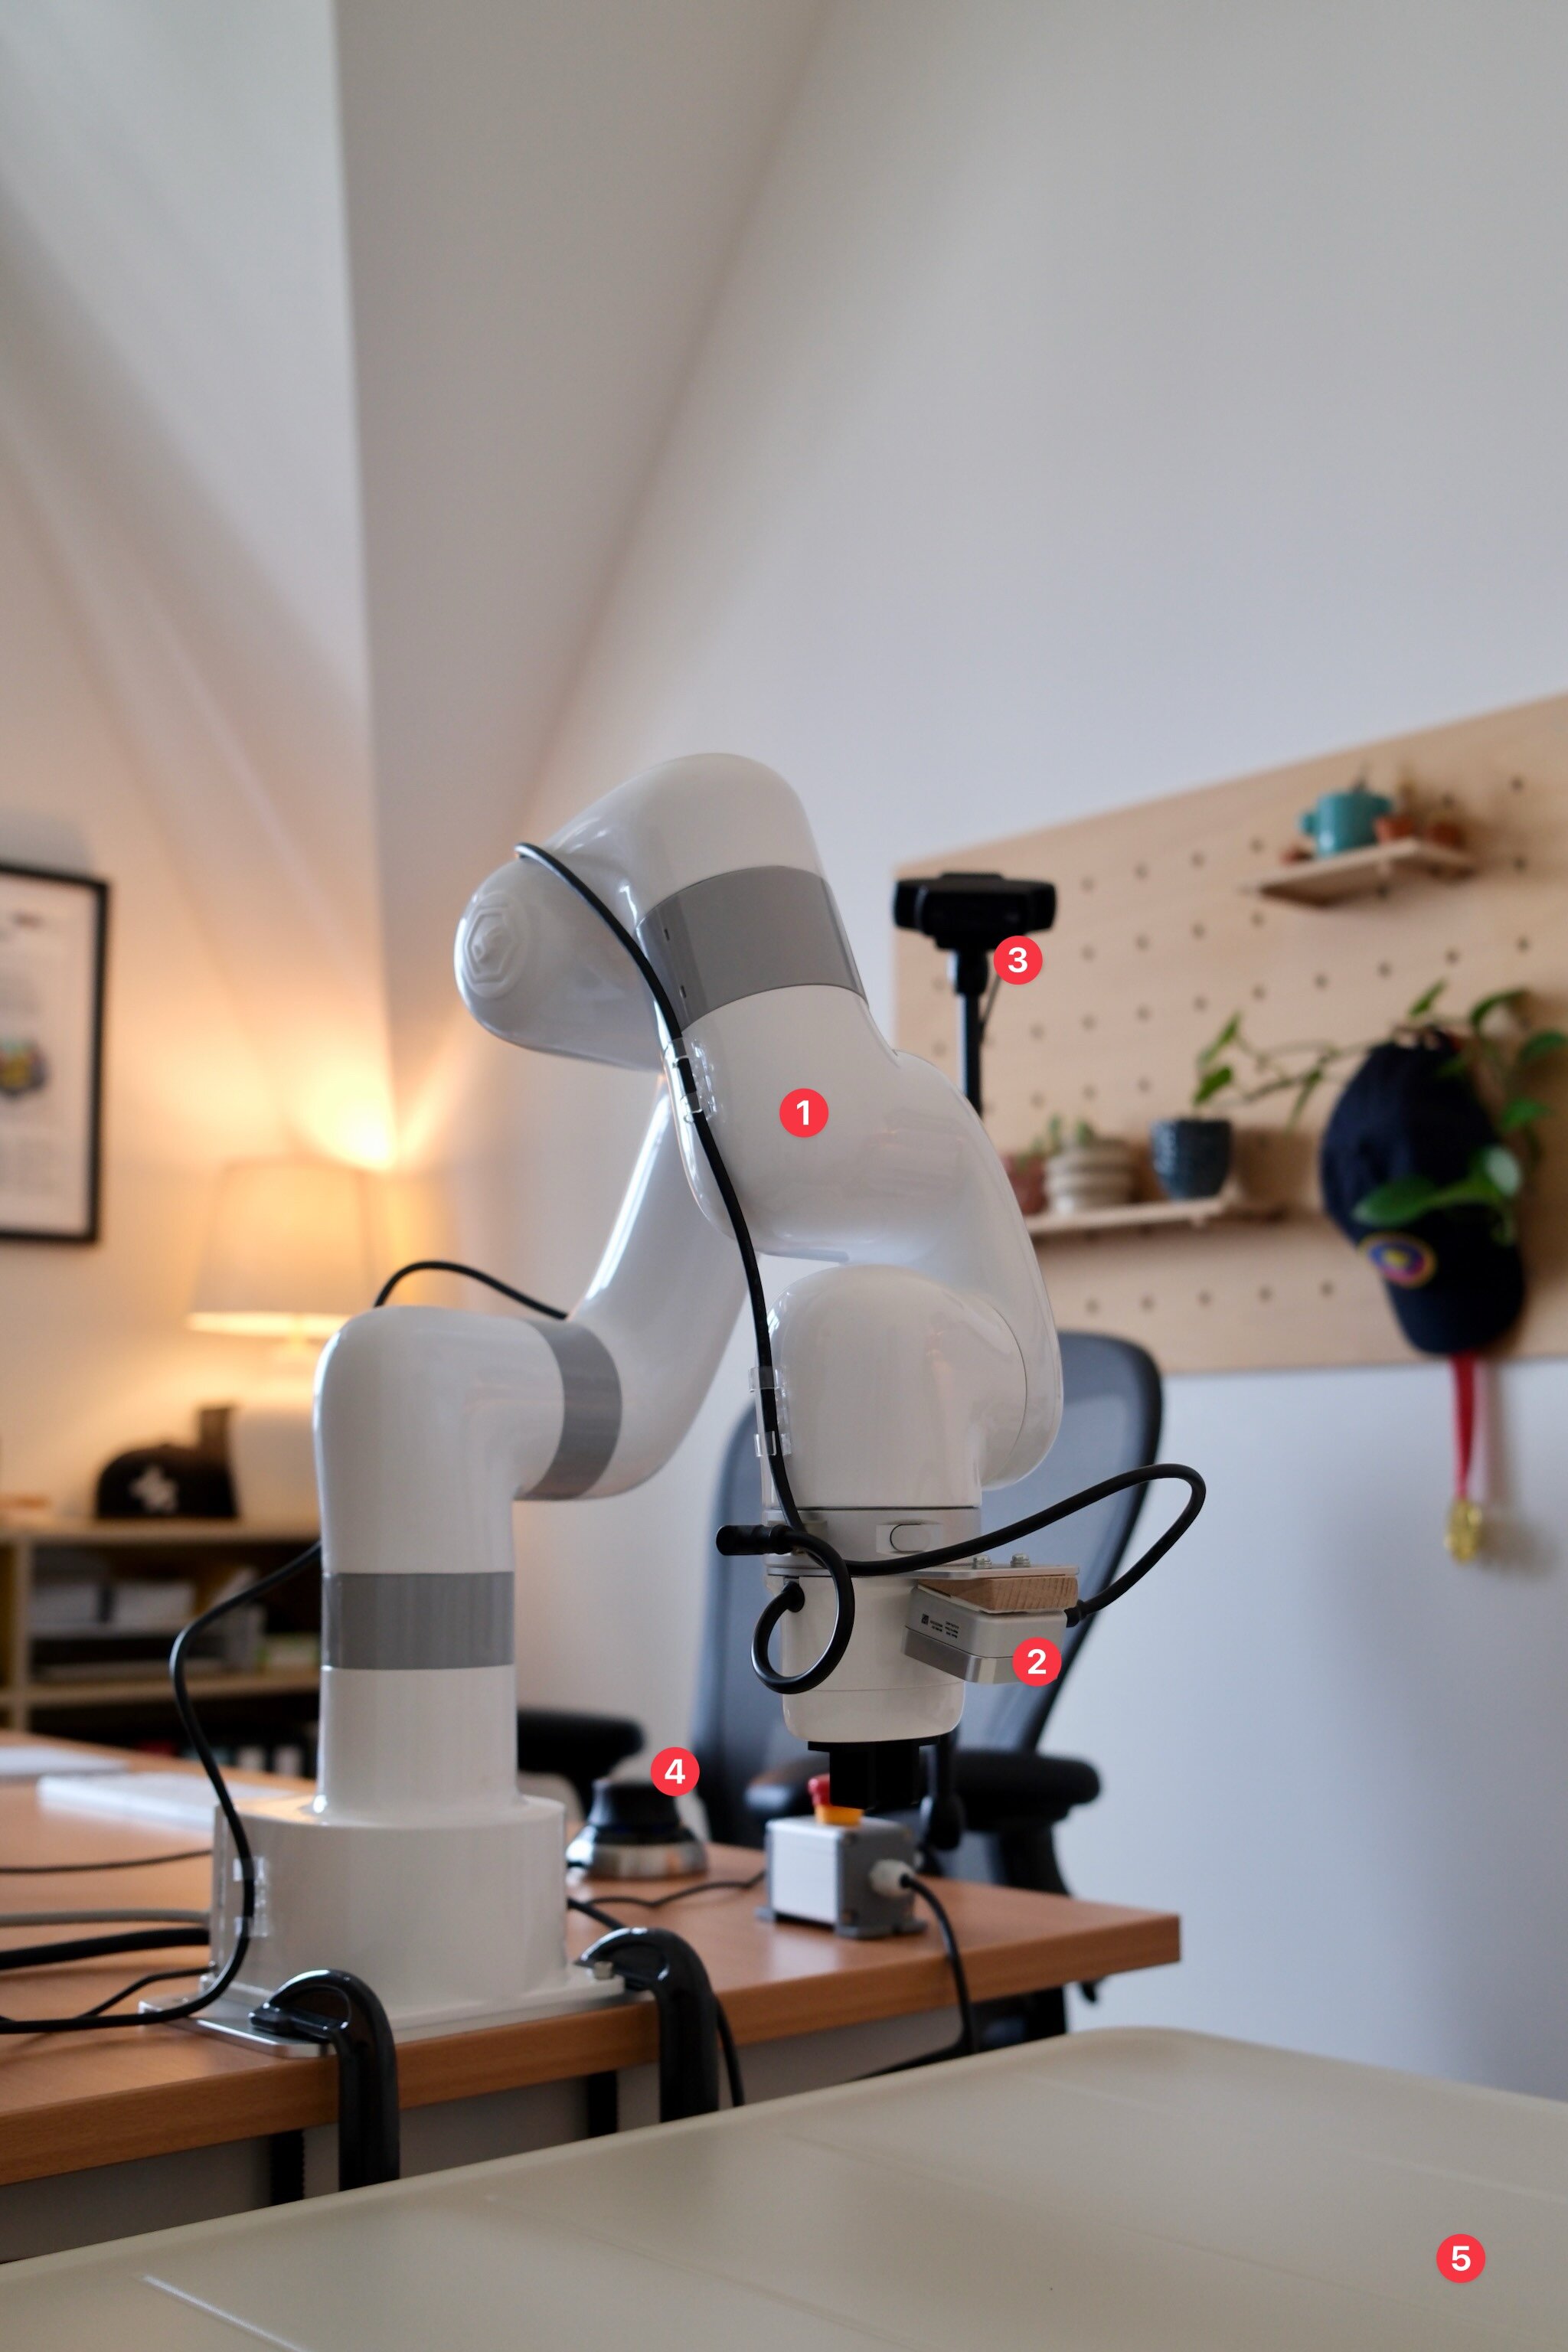
First, capable robot hardware has become dramatically more affordable: the physical setup below uses an industrial-grade arm, two cameras, and a full teleoperation setup while staying below €5,000.11This figure excludes VAT and the cost of compute.
Second, there is now a steady supply of publicly available foundation models that are suitable for robotics. Hugging Face’s LeRobot, for example, is built around the same idea of democratizing state-of-the-art robotics research.
I have some history with this. Between 2017 and 2020, I did robotic manipulation research at OpenAI, first on a humanoid hand and then on a tabletop. The tabletop setup I worked with around 2019/2020 was roughly an order of magnitude more expensive than the one described here. The comparison is not perfect, but the fact that this version is even in the same category of usefulness at this price point is the important change. Back then, this kind of work required a team of around 20 people. If my thesis is right, a single person at a desk should be able to get surprisingly far today.
So, to test this thesis, I’ve decided to just do it: I will spend the next several months doing independent research on robotic manipulation, and I will do it in the open. I don’t expect the main output to be papers or an open-source codebase.22I currently don’t plan to open-source the code described here. Maintaining an open-source project is real work, and I’d rather spend that time on research. This might change. What I care about here is the research log itself: what works, what fails, and what I learn from running the system.
This note covers step one: building the full foundation for doing research. The first half is about the physical setup: an industrial-grade robot arm, two cameras, and teleoperation in a package small enough to live next to my desk. The second half is about the software stack I wrote from scratch to operate it. The video above shows the result in action.
This is an experiment and the plan might change. But I’m excited.
Requirements
From past experience, I know that robotics research should be done on actual hardware, so step one is building a setup that I can experiment on. Before buying anything, I wrote down a few requirements. They apply to the system as a whole—the physical setup and the software that operates it:
- Less than €10,000
- Small enough that I can put it on or next to my desk
- Parts readily available (no enterprise sales)
- Easy to use via Python
- Unopinionated about the software stack (since I want to build my own)
The €10,000 limit was not derived from a detailed estimate. At the time, I mostly did not know what the final system would cost. The number was useful as a ceiling: high enough that I would not have to optimize every component for price, but low enough that the setup would still be affordable enough for my scale.
These five constraints explain most of the decisions in the rest of this post.
Physical setup
I decided to build a setup for tabletop manipulation with a single arm. Tabletop manipulation is nice because it offers endless tasks of varying difficulty: for example, you can start with a basic single-object pick-and-place task but gradually move towards setting up a chessboard or assembling Lego, all within the same physical setup.33We had the same reasoning 6 years ago on the OpenAI Robotics team. After solving the Rubik’s cube, we moved towards a tabletop setup because it can support so many different tasks, and we were interested in general-purpose robotics.
I opted for a single robot arm instead of a bimanual setup for simplicity, space, and cost reasons. This choice, however, imposes some real limitations on what types of tasks I can do: for example, folding a shirt with a single arm is probably impossible. But a single arm still leaves plenty of interesting tabletop tasks, and it forces a useful kind of constraint: the policy has to compensate for missing hardware with behavior. It can push an object against another object or the table edge to hold it in place, reposition something before grasping it, or use the environment as part of the manipulation strategy. For now, that is exactly the regime I want to study.
For vision, I use a wrist-mounted camera and a stationary camera. A constraint I have here is space: I cannot build a fully integrated “robot cage” lab setup, which means that the positions of the cameras, the lighting conditions, and the background within the field of view will change over time. The trade-off is that the data will be messier than in a fixed lab setup. However, I think of this as a feature and not a bug: for robots to become truly useful, they must work under exactly these circumstances.
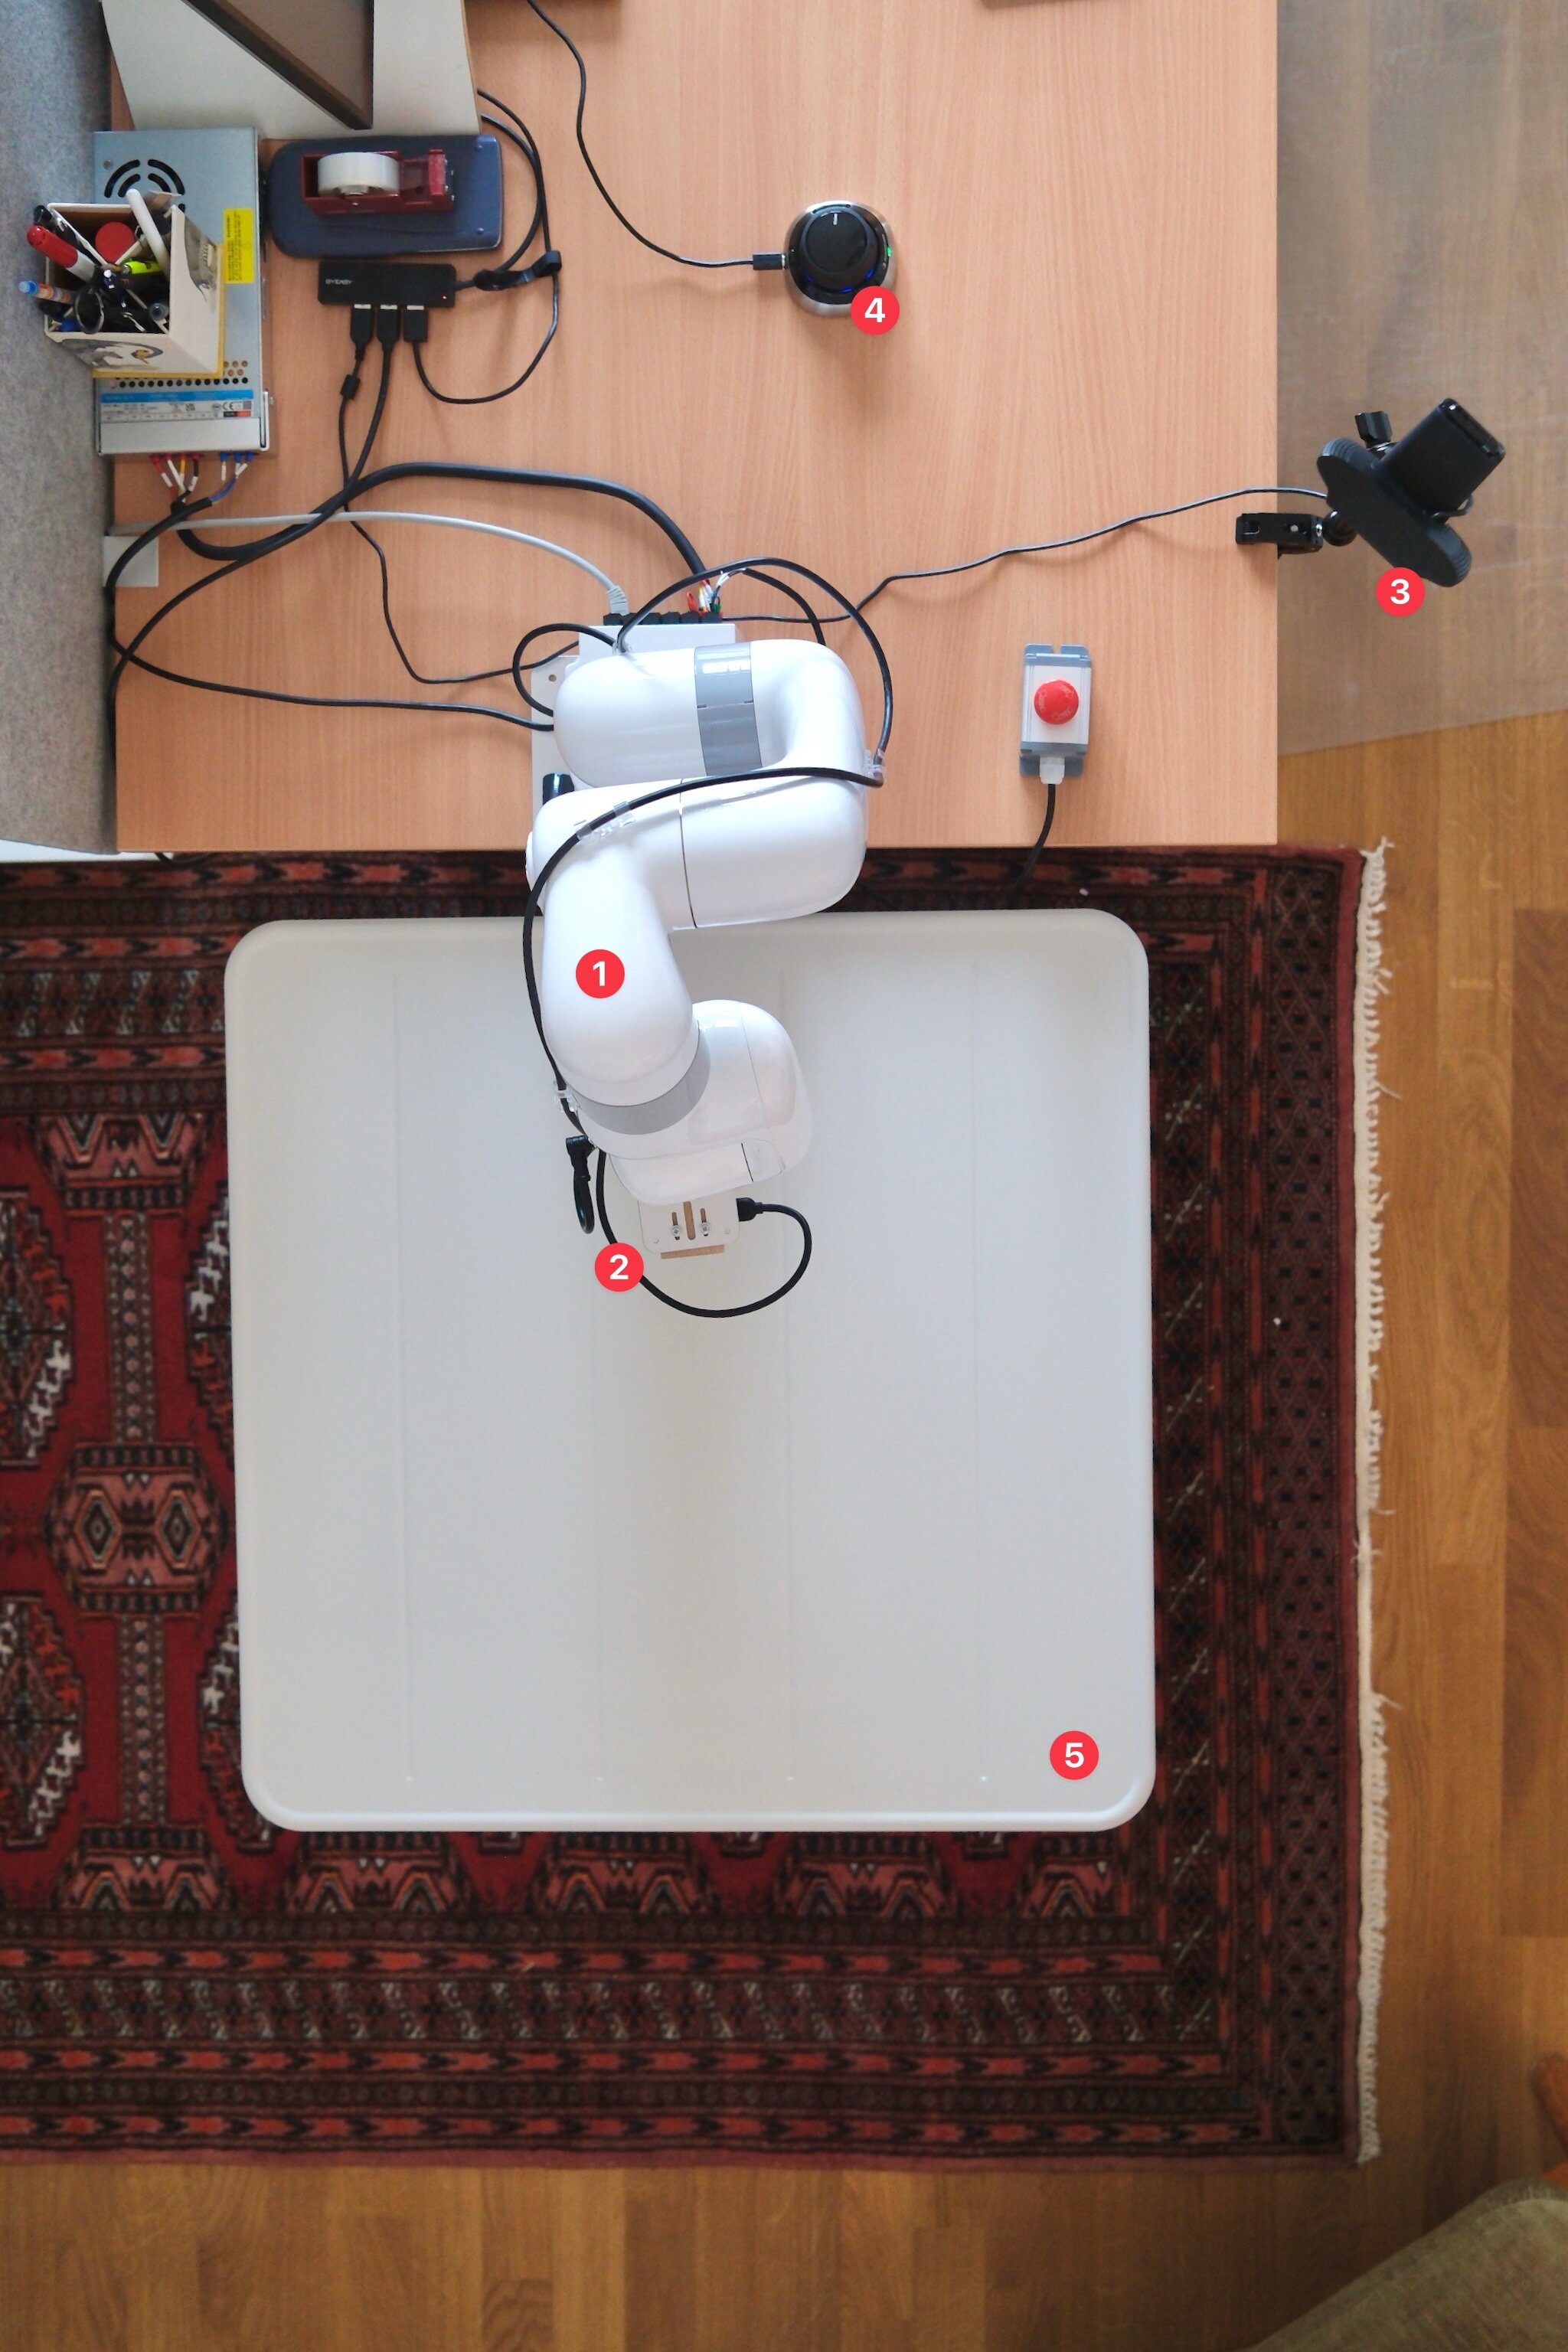
To test the setup and to record data, I use a 6-DoF space mouse to teleoperate it. I use a simple, foldable IKEA table next to the robot to separate my own workspace (which tends to be cluttered with various objects) from the robot’s. It’s also safer.
Because the robot “sits” directly next to me, using it is very low friction. While originally motivated by space constraints, I really enjoy this setup for quick iteration and development work throughout the day.
Depicted below is the full physical setup that I’ve ended up with. I’ll describe the individual components in greater detail below.
Bill of materials
The full bill of materials is below. All prices are what I paid at the time, excluding VAT. I also include links to the places where I bought them for convenience, but all parts should be readily available from various other resellers.
| Product | Price | Purchase Link |
|---|---|---|
| UFACTORY xArm Lite 6 | €3,403.32 | Reichelt |
| UFACTORY xArm Lite 6 gripper | €444.50 | Reichelt |
| UFACTORY xArm camera mount | €89.03 | Reichelt |
| Intel RealSense D405 camera | €302.51 | MyBotShop |
| Logitech C920 camera | €47.86 | Reichelt |
| USB cable for Intel RealSense (3m) | €20.25 | Reichelt |
| SmallRig Desktop Magic Arm | €28.90 | Foto Koch |
| 3Dconnexion SpaceMouse Wireless | €174.70 | Amazon |
| AGPTEK cable clips | €8.32 | Amazon |
| IKEA SUNDSÖ folding table | €50.41 | IKEA |
| Total | €4,569.80 |
The total comes to €4,569.80, excluding VAT and compute. That is less than half of the €10,000 budget I set in my requirements. The important part is not that this is cheap in absolute terms, but that it is cheap enough for an individual or small team to iterate on real hardware.
Compute is the one caveat. You obviously need GPU compute to train policies and, eventually, serve them. I left it out because I already had compute available,44The compute I already had is a NVIDIA DGX Spark box. and I suspect the same is true for many researchers.
Robot arm
I picked the UFACTORY xArm Lite 6 because I wanted to have a reliable, industrial-grade robot arm. I think cheaper arms like LeRobot SO-101, OpenArm, and the Robot Learning Company are interesting and I’m glad they exist.55In fact, I also bought a LeRobot SO-101 kit. It’s much more affordable (around €450) but also obviously much more toy-ish.
However, my past research experience has taught me that buying a precise, mature, and durable robot arm makes everything so much easier: they just work and they rarely break. The UFACTORY arm in particular is very appealing because it is surprisingly affordable and comes with a pragmatic Python SDK.
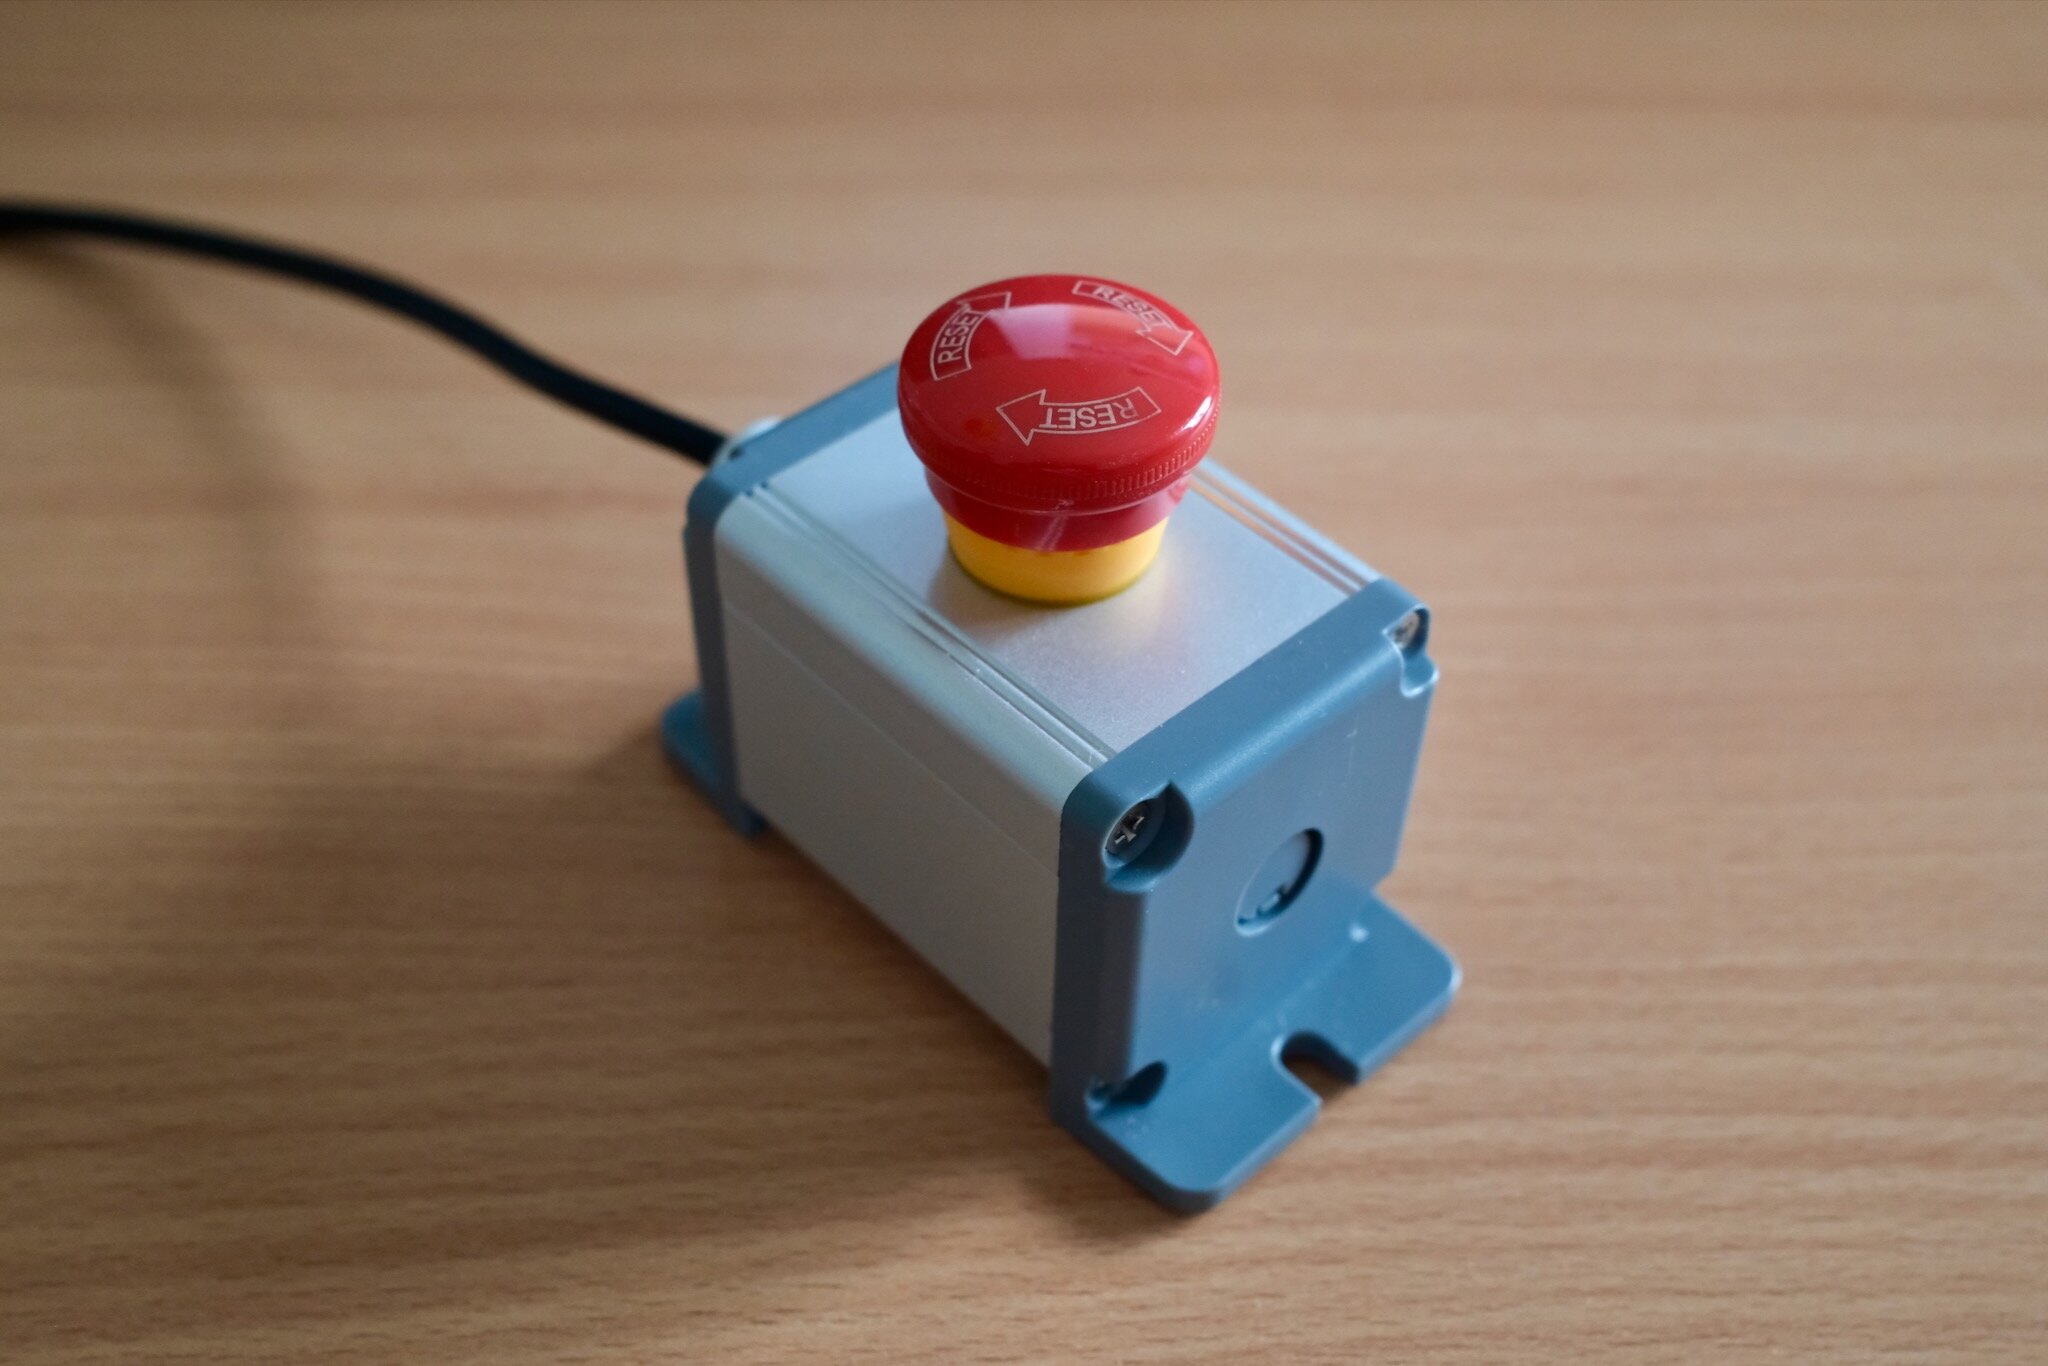
So far, I’m extremely happy with my choice. The robot arm comes in a nice case (easy to transport if I ever have to) and seems very well-built. It also comes with a base and two clamps to fix it to a table, an emergency stop button, and an external power supply (supports both 110V and 220V).
The setup was extremely simple. I estimate that it took me roughly 30 minutes to go from unboxing to operating it for the first time. The arm connects via Ethernet and offers a convenient web interface to operate it.

Beyond the web interface, the first-party Python SDK makes operations very simple. The arm can be actuated via joint positions or velocities, but it also supports actuation in TCP space.66Tool center point (TCP) is the reference point or frame attached to the end effector whose Cartesian pose you care about. For a gripper, this is often somewhere between the fingers rather than the physical mounting point. Actuation in TCP space means that you command the desired pose or velocity in Cartesian space and the robot controller computes the corresponding joint motion. The latter works great and it’s what I use in practice.
The robot also already comes with several safety features: it has self-collision avoidance, configurable global speed and acceleration limits, detects and avoids joint limit violations, and senses and aborts if too much force is detected (with the sensitivity being configurable as well). It further supports a “teach mode” where a human operator can freely move the arm around.
For the gripper, I decided to use UFACTORY’s xArm Lite 6 parallel gripper. The gripper works but it’s the weakest part of the setup. It’s pneumatically actuated, so it’s quite noisy when turned on, and rather weak. There are no sensors in the gripper itself, so determining the open/closed state can only be done by reading the control signal.
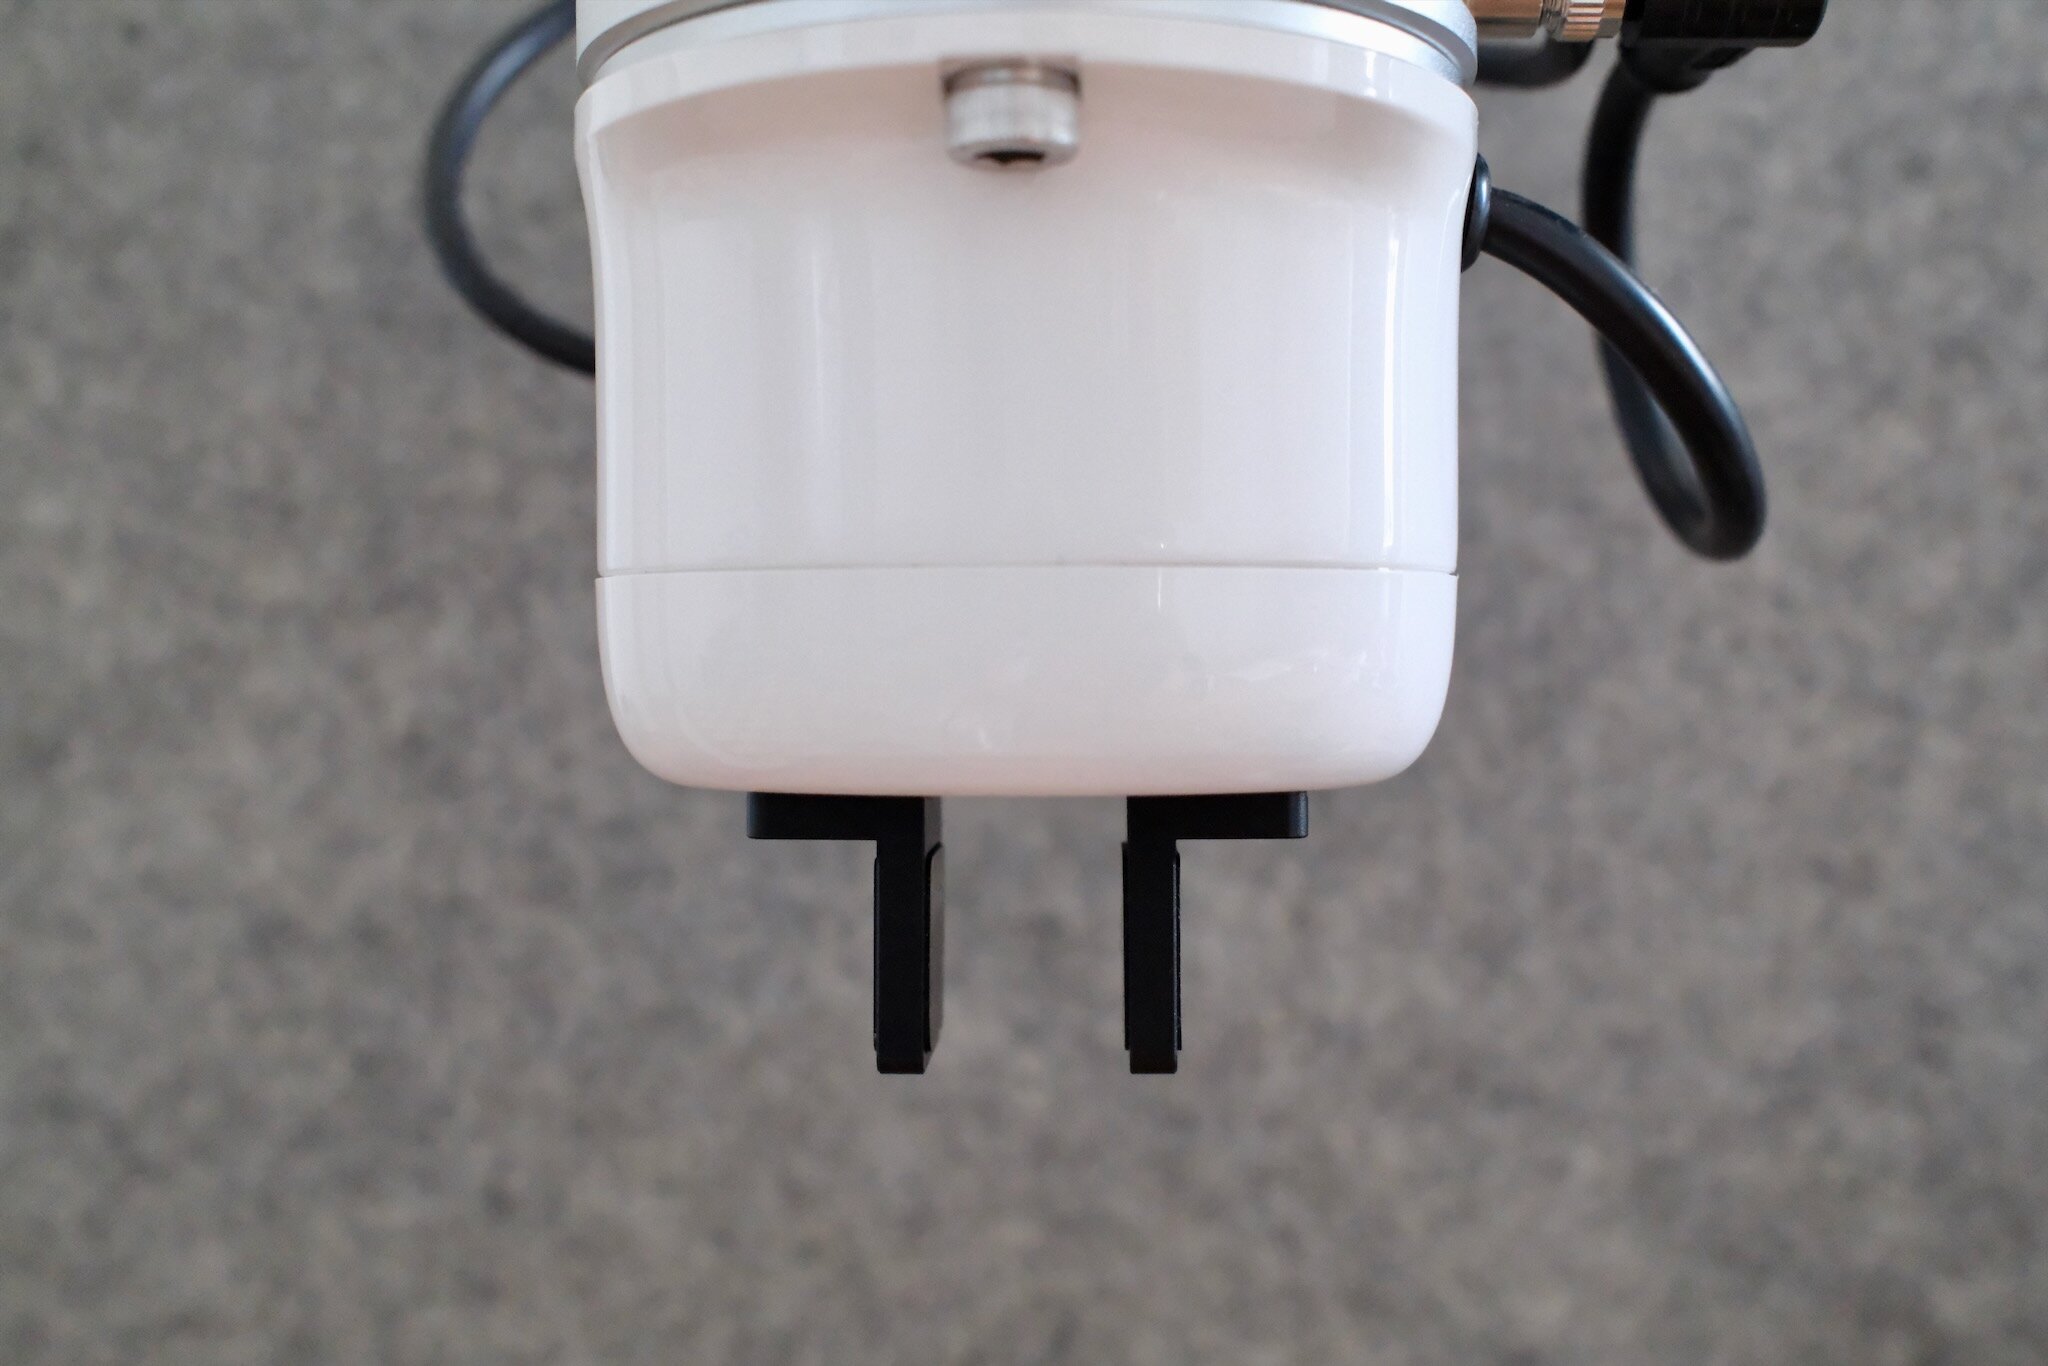
It’s also quite inflexible: the gripper is able to fully close, but then the maximum width when opened is very narrow (depicted above). It’s possible to reconfigure the gripper into a “wide” configuration. This is done by unscrewing the two fingers, swapping them, and screwing them back in. In this configuration, the gripper is much wider when opened, but it cannot fully close anymore. So you have to pick your poison: either you can grasp small objects, or you can grasp larger objects, but not both with the same setup.
However, the robot arm has a standard end-effector mount so the gripper can be exchanged. UFACTORY also makes a vacuum gripper and a more advanced parallel gripper. It also supports the much more advanced (but also much more expensive) Robotiq grippers. So if the current gripper becomes too much of a bottleneck, I can swap it out.
Cameras
The main modality for sensing that I intend to use is vision.77Of course I will also use the robot’s proprioception: its joint angles, gripper state (open vs. closed), and TCP pose (via forward kinematics). I decided on a two-camera setup for now: one wrist-mounted camera and one static camera mounted to my desk with the robot’s entire workspace within its field of view.
Wrist camera
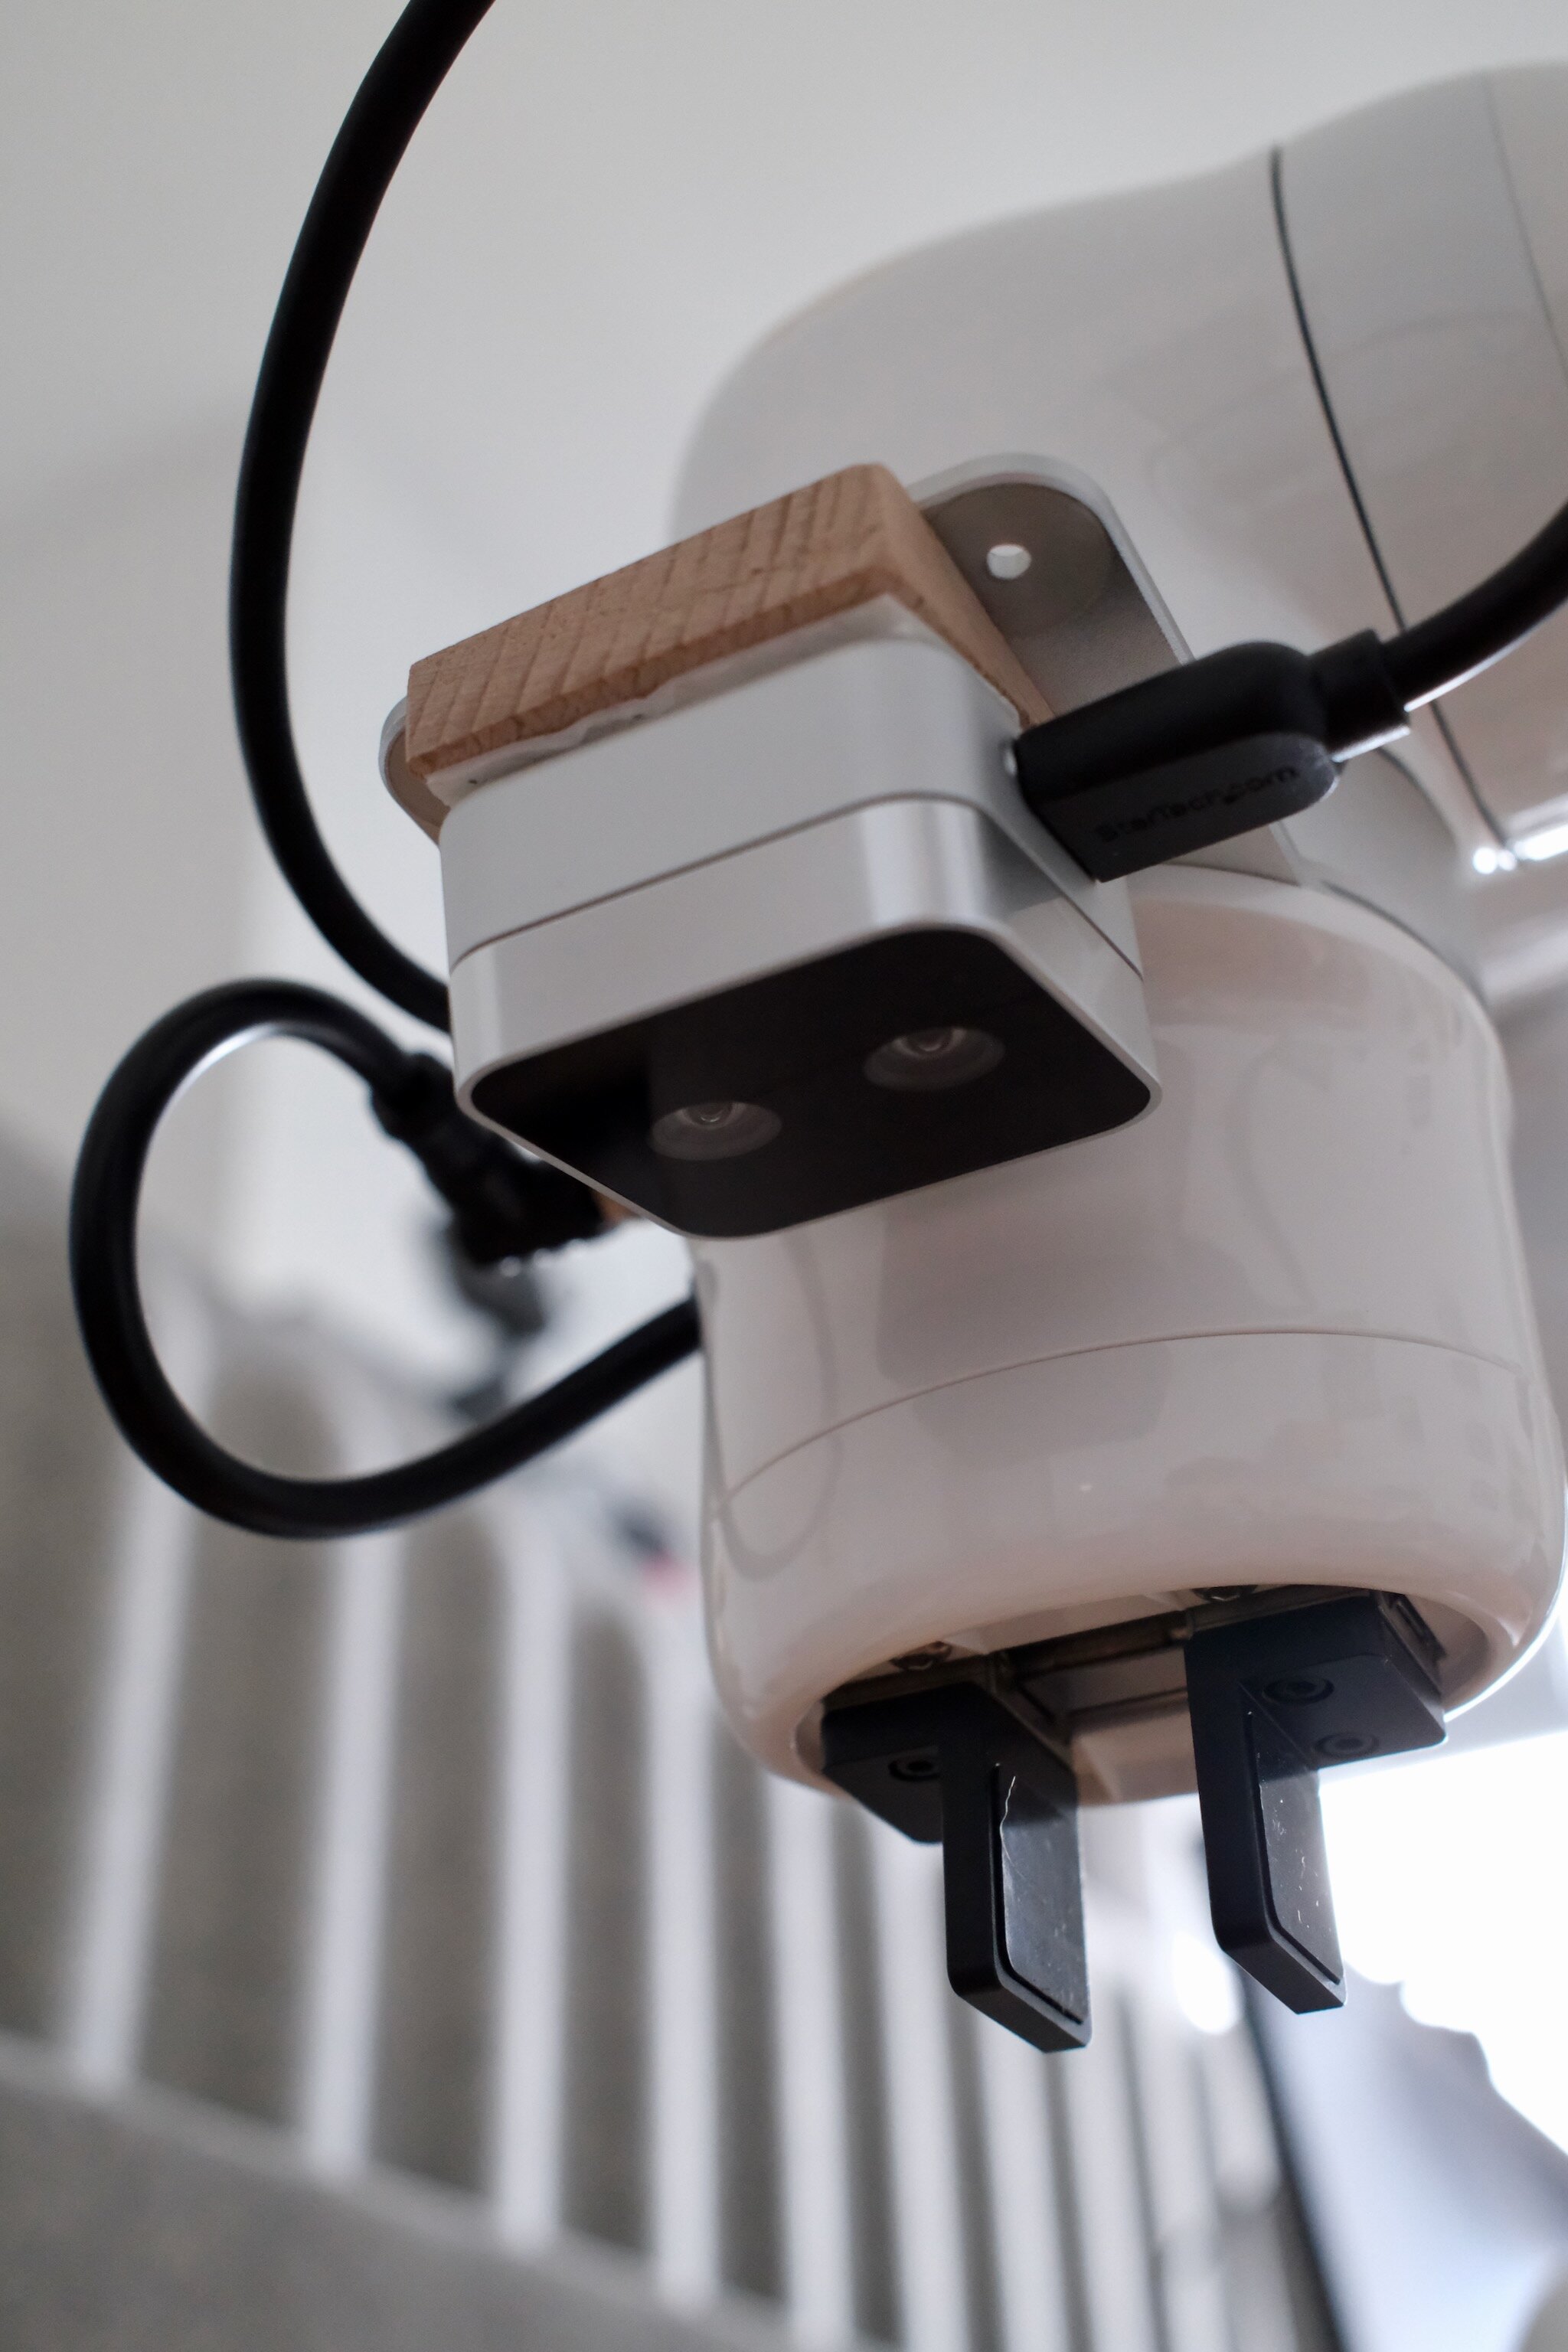
For the wrist camera, I opted for the Intel RealSense D405. The main reason for this is its compact form factor, global shutter, and 7 cm to 50 cm operating range, which makes it ideal for a wrist-mounted camera that moves around and gets close to other objects.
It also supports a 16-bit depth channel at 720p resolution and 30 fps. The camera relies on stereo vision for this but conveniently already does the necessary processing on-device and directly outputs RGB-D. My hypothesis is that depth will help most when training policies from scratch, because it exposes geometry directly and may help policies generalize better across changes in texture, lighting, table appearance, and background. I am less sure how useful it will be for fine-tuning vision-language-action models (VLAs), which are usually pretrained on RGB-only data; adding depth may be more work than benefit there. In either case, I’m excited to be able to ablate RGB-only vs RGB-D for learned policies.
The wrist camera connects via USB3, and Intel offers its pyrealsense2 SDK for accessing it from Python. Unfortunately, it’s not compatible with macOS. Fortunately, though, you don’t have to build it yourself from source since there’s a community-maintained version, pyrealsense2-macosx, that ships pre-built wheels for macOS Tahoe. Running it requires sudo permissions, but other than that it works great.
For mounting, I want the camera to be at a slight angle so that it looks downward but has the robot’s gripper within its field of view as well. In my experience, this is quite useful since the robot gets a sense of its own position relative to the object’s position within a single frame of reference. I found a very low-tech solution for this: I use a piece of wood cut at a 15° angle.88I don’t own a miter saw, so somewhat hilariously I bought these wooden door stoppers and cut them to size.
This is also a good example of how DIY the setup still is: the robot arm, camera, and camera mount are off-the-shelf, but getting the camera into the exact position I wanted still required a small custom adapter. Cable routing is similar: the wrist camera’s USB cable needs its own routing solution, so I use cheap clip-on cable guides rather than anything purpose-built.
Static camera
The second video feed comes from a Logitech C920 webcam. Honestly, there’s not that much to say about it other than that it’s fine. Its main selling point is that it’s very cheap (less than €60). I already noticed that it’s less reliable than the Intel RealSense wrist camera; it occasionally drops frames. It connects via USB2 and can be accessed via the opencv-python package as a standard UVC device. I run it at 30 fps with 720p resolution.99The C920 is capable of 1080p at 30 fps, but 720p is more than sufficient for learned policies.
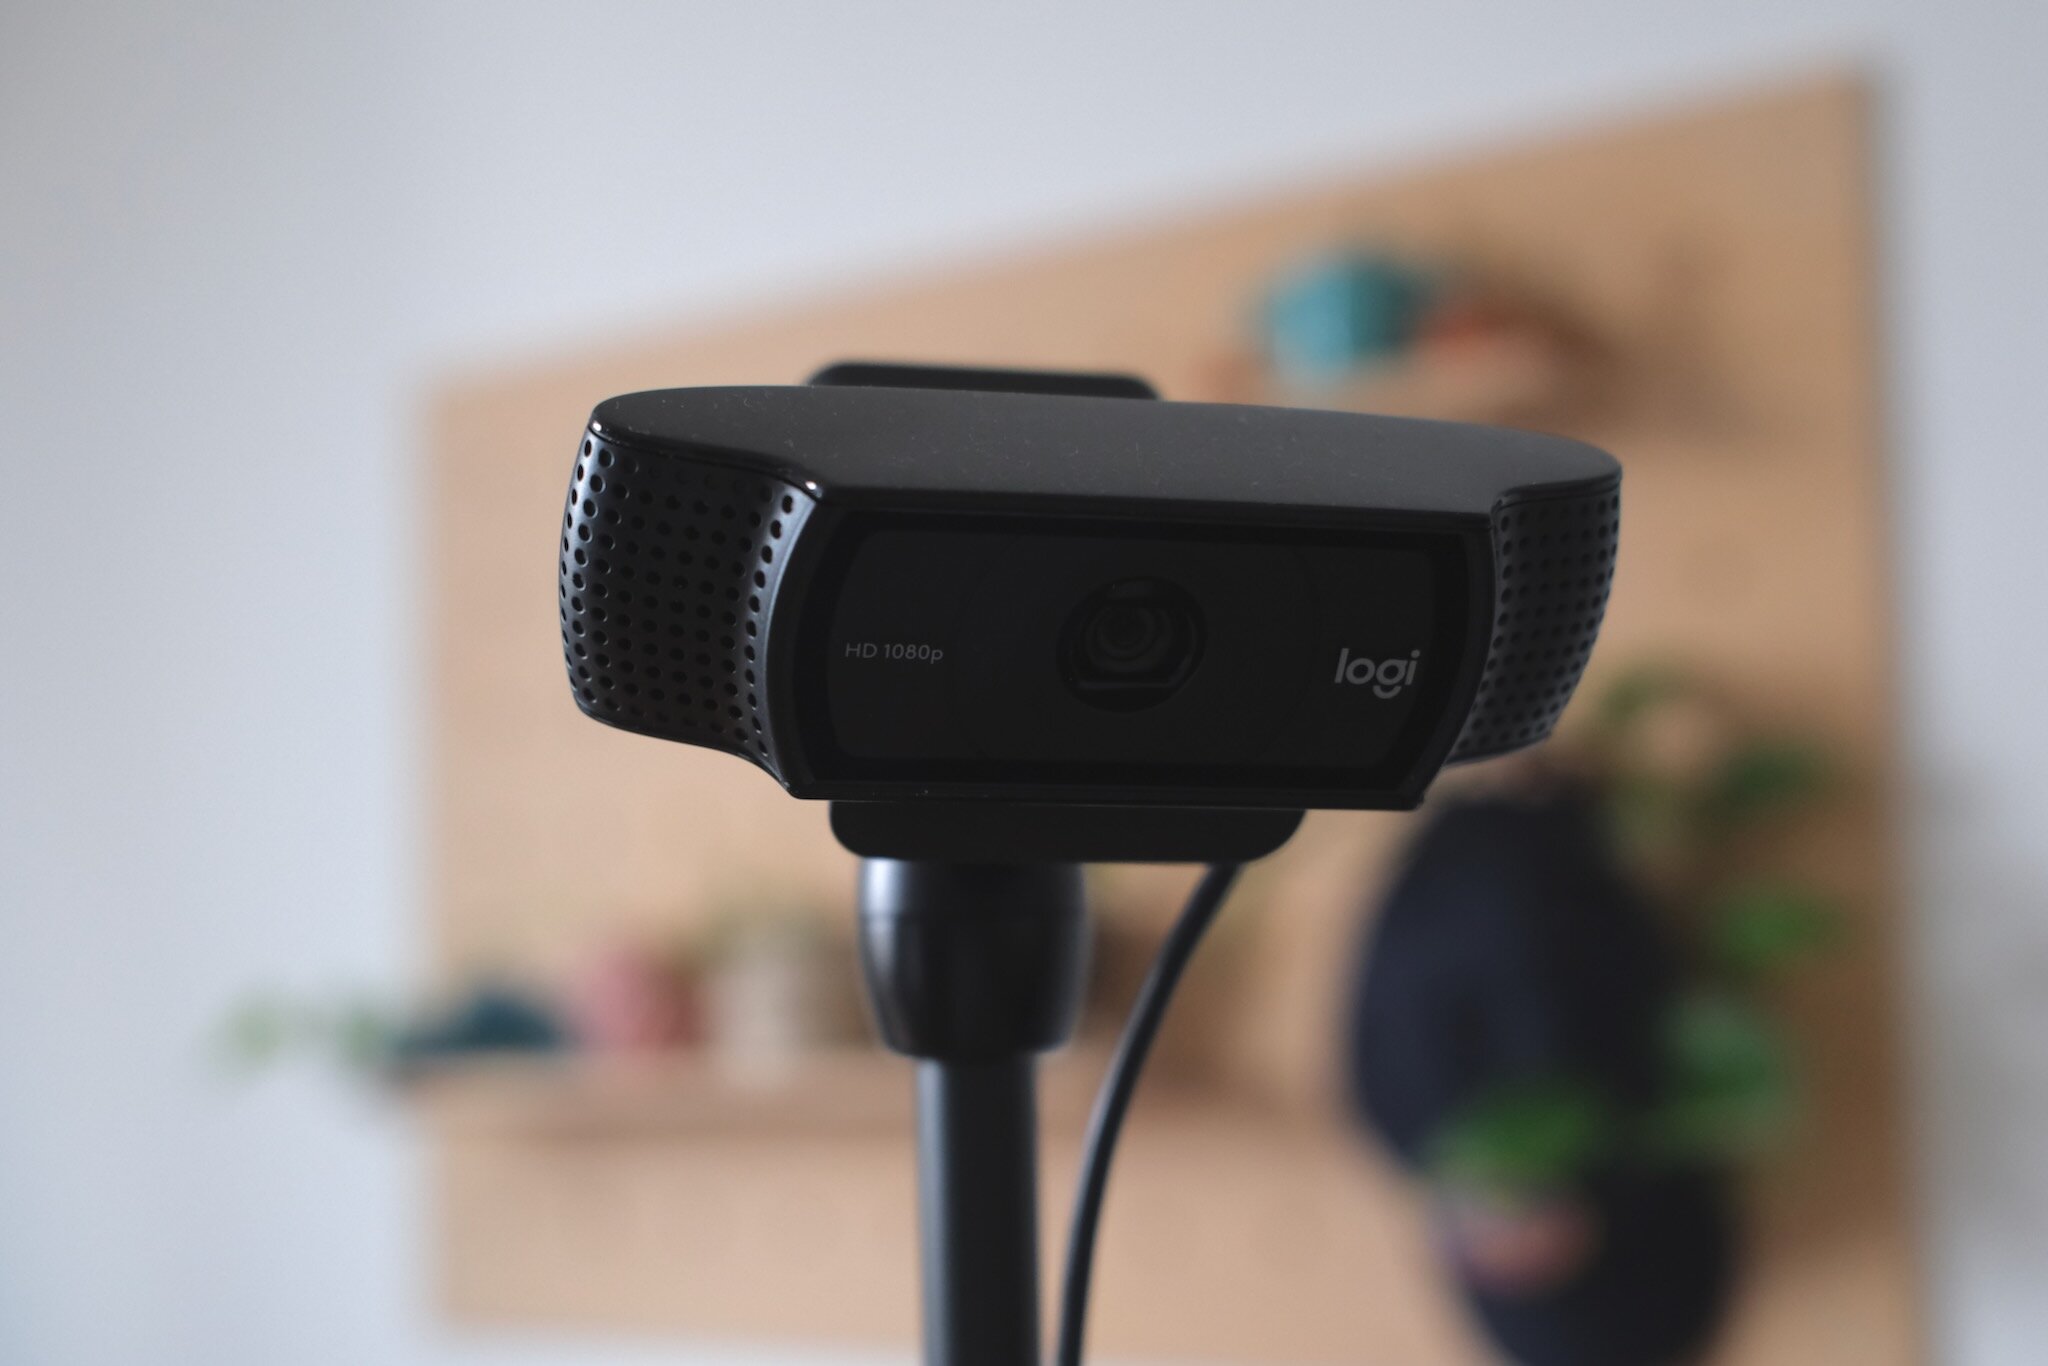
For mounting, I use a SmallRig Desktop Magic Arm. The C920 comes with a standard 1/4” tripod thread, so the arm mount screws directly into the camera.
I do not intend to calibrate the camera’s extrinsics or intrinsics for now. That is a deliberate trade-off: calibration would make geometric reasoning cleaner, but it would also add setup overhead and another thing to maintain as the desk, camera, and lighting change. For the first set of learned policies, I would rather see how far raw image observations get me.
Field of view
So, what do the cameras actually see? Below is an example of the video feeds received from the two cameras. For the wrist camera, I separately visualize the 16-bit depth channel and color-code it for easier human interpretation. You can also see the robot’s gripper at the bottom of the wrist camera’s video feed.

Human input
Manual control is very important for two reasons. First, it makes it possible to debug and test the system. Second, most modern machine learning approaches rely on demonstrations that are collected by a human teleoperator.
Using a keyboard and mouse to control the robot is possible but very cumbersome. This is why most people either use a leader-follower setup,1010In a leader-follower setup, you have a second arm with compatible kinematics that the human moves around. In the simplest version, the joint angles of the smaller arm (the leader) are mirrored by the actual robot (the follower), which allows for direct actuation in joint space. a VR headset and hand controllers, or a space mouse. Since I already had one, I opted for the last option: I use a 3Dconnexion SpaceMouse Wireless.
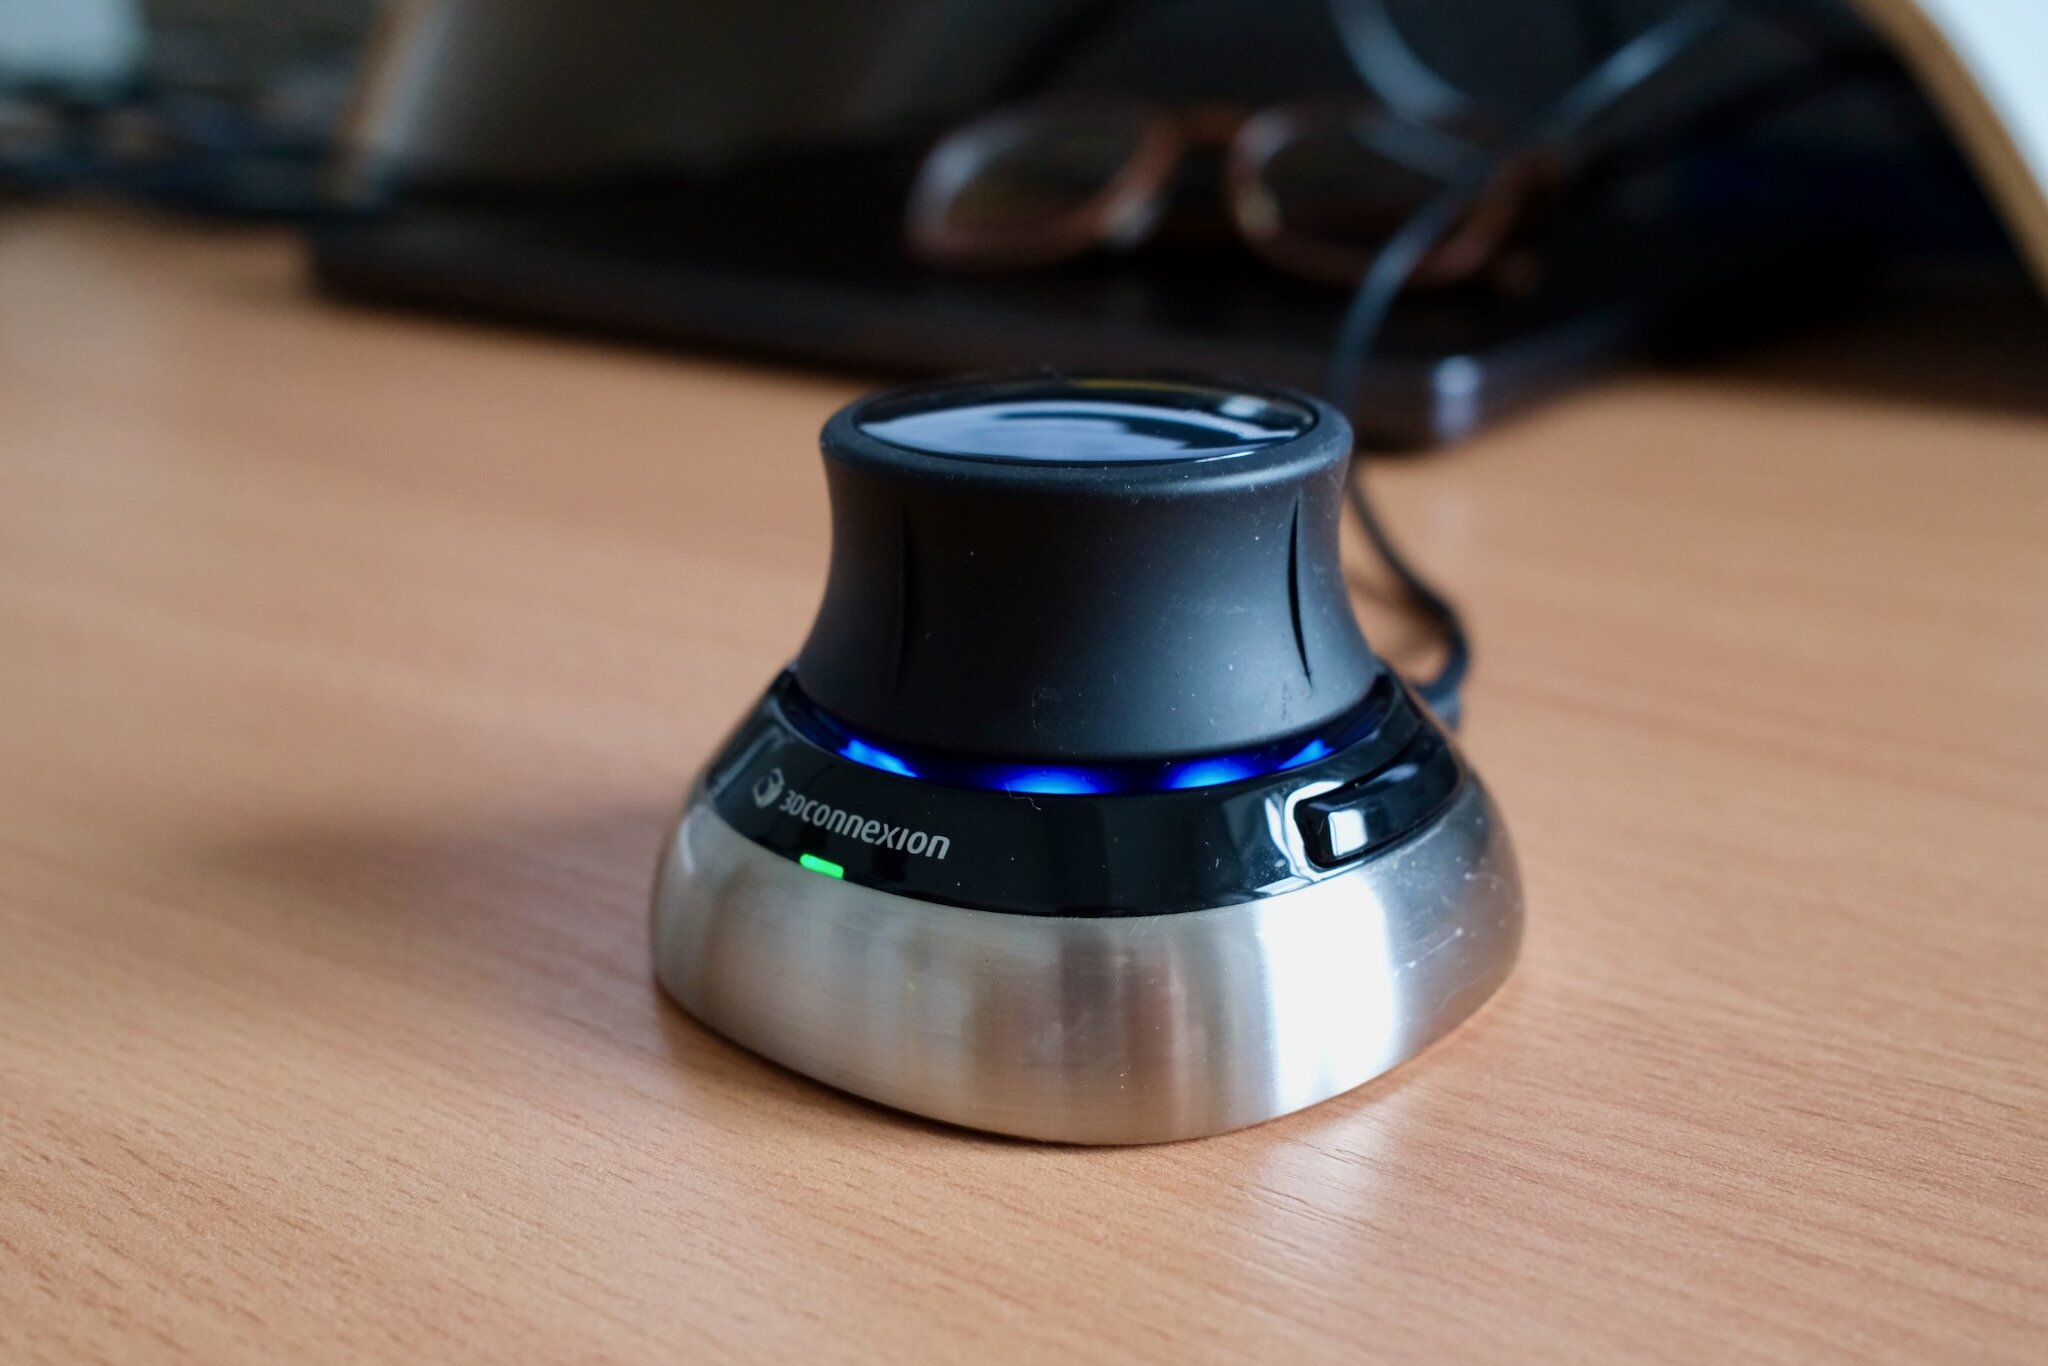
Space mice are commonly used for 3D modeling. They allow 6-axis input: translation in the x, y, and z directions and roll, pitch, and yaw rotation. It works extremely well for translation and yaw rotation (think of this as turning the robot’s wrist). It works less well for roll and pitch, where it eventually becomes very confusing. My solution for now is to constrain the action space to 4 dimensions: x, y, and z translation and yaw rotation. The roll and pitch angles are fixed such that the gripper remains axis-parallel to the table surface. For most pick-and-place tasks this is sufficient anyway, and I suspect it will make learning policies easier as well.
To interact with the space mouse, I use the excellent pyspacemouse library. On macOS, there’s another small pitfall: it requires hidapi (which can be installed via brew install hidapi), and pyspacemouse won’t find the library on its own. Instead of modifying DYLD_LIBRARY_PATH, you can preload it with ctypes.CDLL("/opt/homebrew/opt/hidapi/lib/libhidapi.dylib", mode=ctypes.RTLD_GLOBAL) before importing pyspacemouse.
Software setup
With the physical setup in place, the second half of the project is the software to operate it. All of it lives in a single Python package, robo, that I wrote from scratch: sensing, control, teleoperation, visualization, data recording, and telemetry. It currently comes in at around 3,000 lines of Python (excluding tests and one-off scripts) and runs on my Mac.1111Why a Mac, when virtually all robotics software assumes Linux? It is the same argument as putting the robot right next to my desk: running everything on the laptop I work on all day is the lowest-friction approach possible. And modern M-series Macs are incredibly powerful, so they make for great robotics machines.

robo viewer, with the sensed robot state, safety area, and two camera feeds visible. The viewer doubles as the control panel for the human operator: it allows starting and stopping recordings.Before going into the individual parts, I want to explain the most consequential decision for this project: I intentionally decided against building on ROS 2 or LeRobot,1212I still use LeRobot for training and running baseline policies; I only decided against building on top of their abstractions for the robot interactions. and instead wrote my own stack. There are two reasons for this:
- I believe that full control over the whole stack is critical for research. Research means doing things the framework authors did not anticipate, and when something behaves unexpectedly I want to be able to go into any piece of the software and change it.
- Full-stack understanding matters even more than control. The software is part of the system that a learned policy operates in. Control frequencies, observation latencies, actuation behavior: all of it shapes the learning problem. If I know exactly what happens between a camera frame arriving and a motor command leaving, I can take that into account when developing and debugging policies.
To be clear, this is not “build everything yourself” absolutism. I lean heavily on excellent off-the-shelf libraries: MuJoCo for modeling, kinematics, and visualization, Rerun for data recording and visualization, Prometheus, InfluxDB, and Grafana for observability. I also use LeRobot for training and running baseline policies, and the vendor SDKs for the hardware. The part I insist on owning is the architecture that connects them.
Architecture
The core problem that robot software has to solve is that many things happen concurrently and at different rates: the cameras deliver frames at 30 fps, the space mouse reports at 100 Hz, the control loop runs at 50 Hz, the viewer renders at 30 Hz, and telemetry and recording should keep up as well as they can without disturbing any of the above. ROS solves this with nodes that communicate via publishers and subscribers over the network. I use a radically simplified version of the same idea: everything runs in a single Python process, and components communicate via a simple in-memory pub/sub event bus.

robo architecture: services run in one Python process, each on its own thread and at its own frequency, and communicate via an in-memory pub/sub event bus. The controller and the robot observer talk to the arm over Ethernet. Telemetry flows into a local observability stack running in Docker.There are two core abstractions: Service and Event. A Service owns a thread and has a lifecycle. It comes in two flavors: a ScheduledService runs at a fixed frequency and tracks when it misses scheduled ticks, while a PollingService runs as fast as its underlying device delivers (used for the cameras, which block on the next frame anyway). An Event is an immutable dataclass that gets published on the bus. Every event carries three timestamps: a monotonic one for computing intervals, a wall-clock one for correlating across systems, and an optional hardware timestamp (the RealSense, for example, reports the actual capture time from the camera’s clock).
The main advantage of this architecture is that it is very flexible and extensible: there is no direct coupling between services. This makes it trivial to swap out a service for another one: if I teleoperate the robot, I use a controller that listens to space mouse events and drives the robot. If I want to run a policy, I swap that service out for a policy controller instead; the rest of the system does not have to know about this change. Interchangeable controller services also remove a whole class of train/inference mismatch bugs since most of the stack remains the same.
Failure handling is deliberately extreme: if any service crashes, the whole session unwinds—all services stop and the physical robot is paused and disconnected. For research code I much prefer dying loudly over limping along without, say, the camera feed that the policy depends on.
Sensing and control
Sensing and control are the two halves of the loop that everything else hangs off of: one set of services observes the world and publishes what it sees, another consumes those events and drives the robot. The two (only slightly simplified) services below show what this looks like in practice. On the sensing side, the robot observer polls the arm and publishes its state at a fixed frequency:
class RobotObserverService(ScheduledService):
    """Publishes the sensed robot state at a fixed frequency."""

    def __init__(self, name: str, freq_hz: float, robot: Robot):
        super().__init__(name=name, freq_hz=freq_hz)
        self.robot = robot

    def step(self):
        state = self.robot.get_state()
        self.publish(RobotStateEvent(state=state, ...))
The teleoperation controller is the subscribing counterpart. It caches the latest space mouse event and turns it into a robot command at the control frequency:
class TeleopControlService(ScheduledService):
    """Turns SpaceMouse events into robot control actions."""

    def __init__(self, name: str, freq_hz: float, robot: Robot):
        super().__init__(name=name, freq_hz=freq_hz)
        self.robot = robot
        self._spacemouse_event_cache = LatestEventCache[SpaceMouseEvent](max_age_s=0.1)

    def on_start(self):
        self.subscribe("spacemouse", [SpaceMouseEvent], self._on_spacemouse)

    def _on_spacemouse(self, event: Event):
        if not isinstance(event, SpaceMouseEvent):
            return
        self._spacemouse_event_cache.set(event)

    def step(self):
        # We consume the spacemouse event, in order to
        # avoid repeating the same command over and over again.
        spacemouse_event = self._spacemouse_event_cache.pop()
        if spacemouse_event is None:
            return

        # Convert the space mouse event into a robot
        # command and actuate.
        cmd = convert_to_cmd(spacemouse_event)
        self.publish(RobotCommandEvent(cmd, ...))
        self.robot.execute_cmd(cmd)
Two details are worth pointing out. First, _on_spacemouse runs synchronously on the publishing service’s thread, so callbacks must be cheap: here it only stashes the event in a cache (heavier consumers like the recorder put events on a bounded queue instead), and the real work happens in step() on the service’s own thread.1313You might wonder about the GIL. In practice it is less of a problem than it sounds: the heavy lifting (camera decoding in OpenCV, MuJoCo rendering, USB and network I/O) happens in C extensions that release the GIL, and the pure-Python control math is cheap. And if scheduling ever does degrade, the metrics will tell me immediately. Second, the service consumes the cached event, and the cache additionally expires events after 100 ms: the controller would rather do nothing than act on stale input. More on this later in the safety section.
All interaction with the arm goes through a small Robot interface, essentially get_state() and execute_cmd(). The command type that convert_to_cmd produces is deliberately minimal and unitless: normalized TCP translation and rotation deltas with values in , plus the gripper state. This is the action space, for humans and policies alike: the space mouse axes map directly onto it, a learned policy outputs exactly the same thing, and demonstrations are therefore recorded in precisely the space a policy will later act in.
The xArm implementation translates this into motion: the normalized command is interpreted in the current TCP frame, scaled by configurable speed limits, integrated over one 50 Hz control tick into an absolute Cartesian setpoint, clipped to the safety area, and sent to the arm. The arm runs in its “online trajectory planning” mode, which blends the stream of 50 Hz setpoints into smooth motion.
Telemetry and observability
A robot stack written in Python, running on a consumer laptop, is clearly only ever going to be a soft real-time system. I am fine with that trade-off, but I need to be able to see when it degrades instead of guessing. I want visibility into what’s happening.

Prometheus allows me to check if the system is healthy. Every service exports step-duration histograms, missed scheduled ticks, queue depths and drop counters, and per-callback dispatch times via an in-process metrics endpoint.
InfluxDB allows me to see the history of robot commands and state in real time at full temporal resolution. Importantly, I only rely on InfluxDB for observability: I do not use it to record trajectories, since that data is inherently multi-modal (more on that later).
Grafana sits on top of both, with one dashboard for infrastructure health and one for the robot itself. The entire stack runs locally via a single Docker Compose file and I treat the data as transient.
Data recording
The recorder is just another subscriber on the event bus. It writes every event—robot states, control commands, camera frames—into a Rerun .rrd file, one file per episode. Each stream is logged at its native rate; nothing is resampled at recording time. RGB frames are JPEG-compressed (at quality 90), depth frames are stored as lossless 16-bit PNGs, and camera intrinsics are logged once per camera (if available). Every recording carries two timelines: wall-clock time and a monotonic time-since-start, with the latter being the one to trust when reconstructing an episode. Rerun is great here since it allows me to record multi-modal data at different frequencies seamlessly into a single file.
Episodes are grouped into sessions, and each session directory gets a meta.json with the timestamp, the git SHA, and the full configuration of the stack. Every episode is therefore traceable to the exact code and configuration that produced it.
The Rerun recordings consume around 1.4 GB/min. This includes the RGB-D data from the wrist camera, the RGB data from the static camera, the robot state, and the robot commands.

Rerun makes it easy to inspect recordings: an .rrd file opens directly in the Rerun viewer, where I can scrub through an episode with camera feeds, robot state, and all control signals time-aligned. This is great for inspecting demonstrations before training on them.
The training format is a separate concern. A converter script resamples all streams onto a fixed-fps grid (zero-order hold) and writes a LeRobot v3 dataset, so existing training tooling works out of the box. Because the raw recordings preserve the native rates, I can later re-derive datasets at a different fps or with a different alignment strategy without re-collecting any data.
Policy inference
This is the least settled part of the stack, so consider this section forward-looking.
Architecturally, a policy is just another controller: a service that subscribes to robot state and camera events, keeps the latest observation of each, and publishes the same commands as the teleoperation path, at the same fixed control frequency. The rest of the system cannot tell the difference between a human and a policy; the viewer, telemetry, recording, and all safety limits apply unchanged. I currently have an in-process implementation that runs a LeRobot-trained policy, which was useful for validating the loop end to end, but it is not the setup I intend to keep.
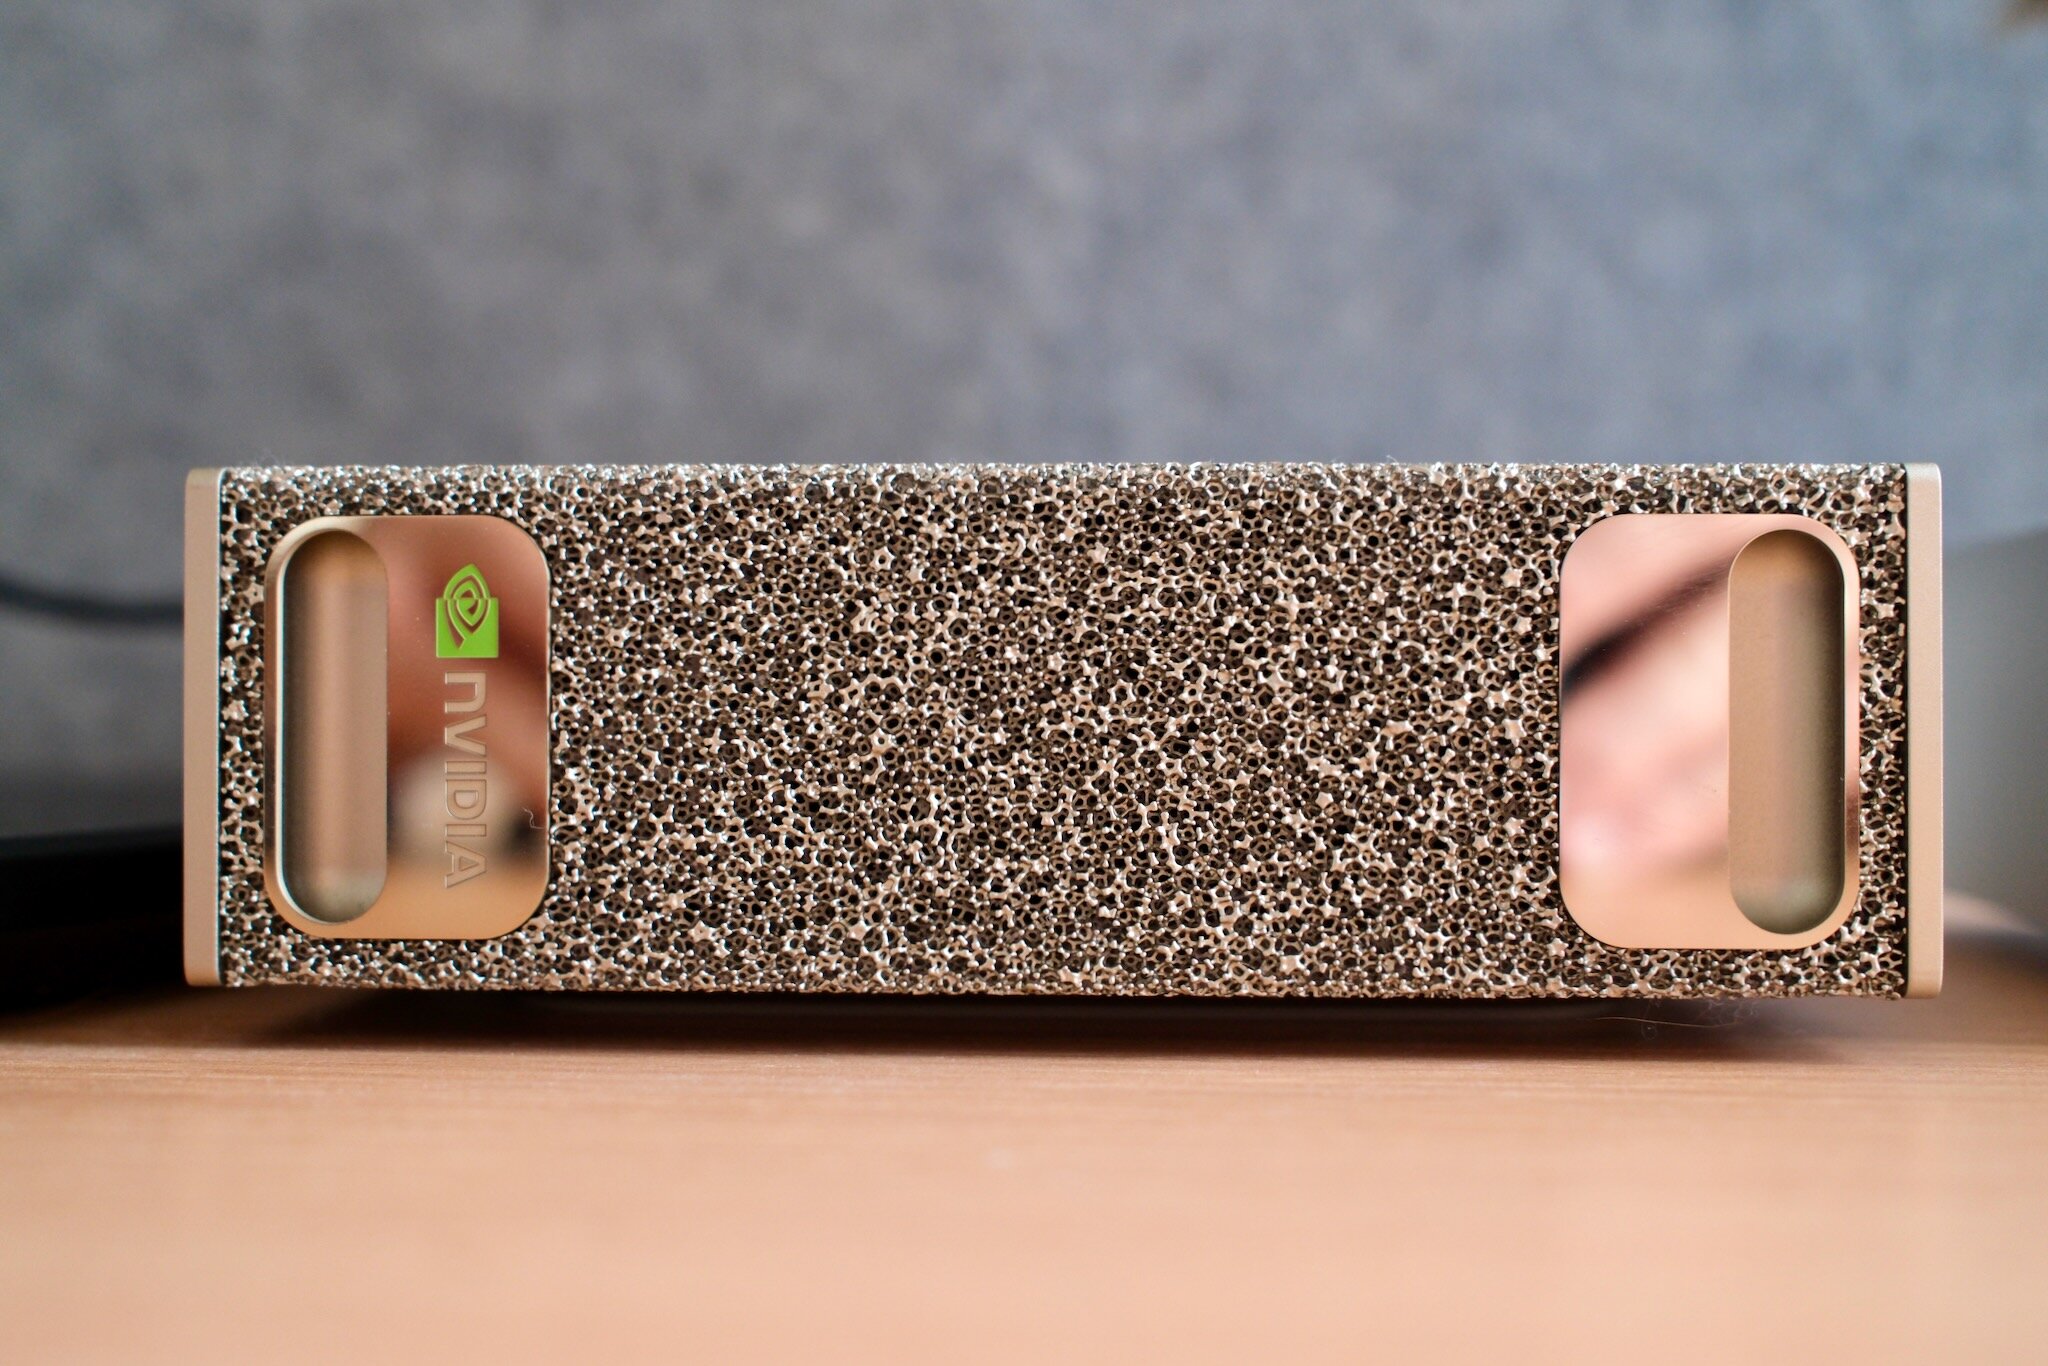
The plan is to move policy inference off the robot machine entirely, onto my NVIDIA DGX Spark. The robot process will connect to a policy server over a WebSocket and exchange msgpack-encoded observations and actions, very similar to what openpi implements: each request sends the latest camera frames and proprioception, and the response contains the next action.
I like this split for several reasons. The Mac that runs the robot stays light: no CUDA, no training framework, no checkpoints. The GPU box can run whatever framework a given policy needs, with the details hidden behind a small protocol.
The boundary also forces the observation/action interface to be explicit. The network hop costs little on a local network and is small compared to a 33 ms camera interval and a 20 ms control tick. I will write more about this once it is running.
Safety
A robot arm—even a small one—moves fast and with real force, and this one operates at the desk where I sit. So safety matters.
The most important safety component is the hardware emergency stop that ships with the arm. It works independently of all of my software and sits within reach whenever the robot is powered. Everything else described below is software, and software can be wrong.
The software still uses defense in depth.
- Every Cartesian setpoint is clipped into a configured safety area before it is sent to the arm, so the robot cannot be commanded outside of it (this is the translucent green box in the viewer).
- Linear and angular speeds are norm-clipped against configured limits.
- Teleoperation input expires after 100 ms: if the space mouse stream dies, the controller simply stops issuing setpoints and the arm comes to rest, since setpoints are only ever one control tick ahead.
- The fail-loud process model: any service crash unwinds the whole session and leaves the arm in a stopped state.
Underneath all of that are the arm’s own safety features described earlier: self-collision avoidance (configured with the gripper’s collision model), joint limits, and force-based collision detection.
What’s next
Now that the physical and software systems are mostly set up, the next step is to put them to use. There are a couple of things I want to do:
- Collect a dataset with 50-100 demonstrations for a simple task, like picking up a pen or pushing an object into a goal configuration. Then train a baseline policy (ACT or Diffusion Policy) on that data.
- Try zero-shot deployment of some current VLA policies. Specifically, I want to try π0.5 and SmolVLA.
Beyond those first experiments, the questions I care about most are: how from-scratch policies compare to fine-tuning VLAs, how much demonstration data different tasks require, whether diffusion or normalizing-flow policy models work better, how RGB compares to RGB-D under changes in lighting and background, and whether a single policy can handle multiple tabletop tasks or whether single-task training remains much easier.
-
This figure excludes VAT and the cost of compute. ↩︎
-
I currently don’t plan to open-source the code described here. Maintaining an open-source project is real work, and I’d rather spend that time on research. This might change. ↩︎
-
We had the same reasoning 6 years ago on the OpenAI Robotics team. After solving the Rubik’s cube, we moved towards a tabletop setup because it can support so many different tasks, and we were interested in general-purpose robotics. ↩︎
-
The compute I already had is a NVIDIA DGX Spark box. ↩︎
-
In fact, I also bought a LeRobot SO-101 kit. It’s much more affordable (around €450) but also obviously much more toy-ish. ↩︎
-
Tool center point (TCP) is the reference point or frame attached to the end effector whose Cartesian pose you care about. For a gripper, this is often somewhere between the fingers rather than the physical mounting point. Actuation in TCP space means that you command the desired pose or velocity in Cartesian space and the robot controller computes the corresponding joint motion. ↩︎
-
Of course I will also use the robot’s proprioception: its joint angles, gripper state (open vs. closed), and TCP pose (via forward kinematics). ↩︎
-
I don’t own a miter saw, so somewhat hilariously I bought these wooden door stoppers and cut them to size. ↩︎
-
The C920 is capable of 1080p at 30 fps, but 720p is more than sufficient for learned policies. ↩︎
-
In a leader-follower setup, you have a second arm with compatible kinematics that the human moves around. In the simplest version, the joint angles of the smaller arm (the leader) are mirrored by the actual robot (the follower), which allows for direct actuation in joint space. ↩︎
-
Why a Mac, when virtually all robotics software assumes Linux? It is the same argument as putting the robot right next to my desk: running everything on the laptop I work on all day is the lowest-friction approach possible. And modern M-series Macs are incredibly powerful, so they make for great robotics machines. ↩︎
-
I still use LeRobot for training and running baseline policies; I only decided against building on top of their abstractions for the robot interactions. ↩︎
-
You might wonder about the GIL. In practice it is less of a problem than it sounds: the heavy lifting (camera decoding in OpenCV, MuJoCo rendering, USB and network I/O) happens in C extensions that release the GIL, and the pure-Python control math is cheap. And if scheduling ever does degrade, the metrics will tell me immediately. ↩︎
Stay up-to-date
Get new research updates delivered straight to your inbox. No spam. Unsubscribe anytime.
Work with us
Have a similarly hard technical problem? We help turn frontier ideas into prototypes.
If you're interested in working with us, please get in touch.